






How to Use Slatted Wall Panels to Create a Feature Wall in Your Living Room
A feature wall is one of the simplest ways to give a living room a clear focal point, and few materials do the job as well as slatted wall panels. Their repeating lines add texture,…
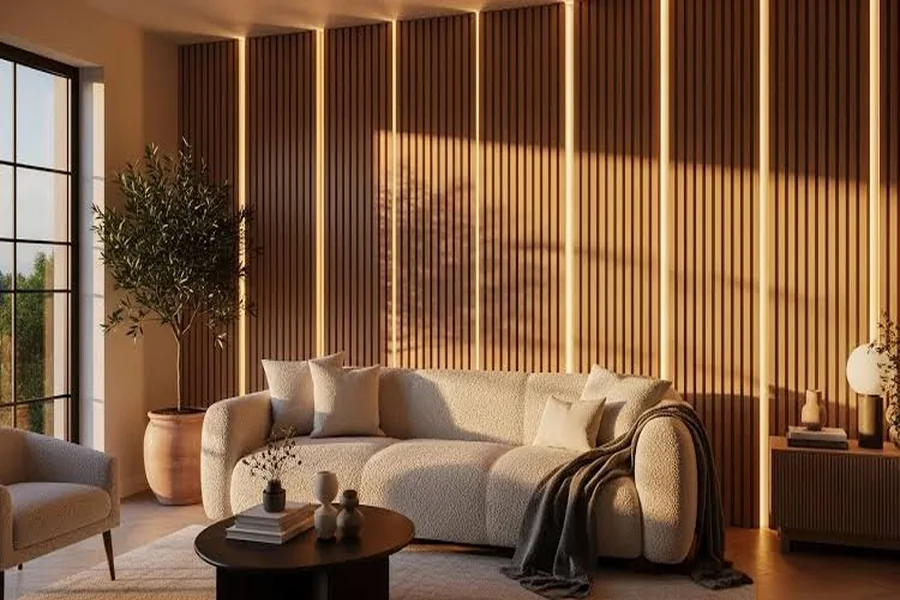
A feature wall is one of the simplest ways to give a living room a clear focal point, and few materials do the job as well as slatted wall panels. Their repeating lines add texture, depth and rhythm to a flat surface, and many systems pair the slats with an acoustic backing that helps soften sound. Whether your style leans towards Scandinavian calm, mid-century warmth or modern minimalism, a slatted feature wall can tie the whole room together.
This guide walks through how to plan, style and install a slatted feature wall so that it looks intentional and works well in everyday family life.
Why slatted panels make such effective feature walls
Paint and wallpaper change a wall’s colour or pattern, but slats change its shape. The raised slats and the shadowed gaps between them catch light differently through the day, so the wall looks three-dimensional rather than flat.
Slats also bring practical benefits. Living rooms are full of hard surfaces such as glass, flooring and plastered walls, which reflect sound and can make a television or conversation feel echoey. Slatted panels with an acoustic felt or insulation backing absorb some of that sound, making the room feel calmer. They are also a tidy way to cover minor wall imperfections without replastering.
Choosing the right wall
The best feature wall is usually the one your eye already goes to when you enter the room. In most living rooms, that is one of three places:
- The media wall. Slats behind a wall-mounted television frame the screen and help disguise cables, especially when combined with a floating shelf or low unit.
- Behind the sofa. This anchors the seating area and gives the room a clear backdrop, which works well in open-plan spaces where the living zone needs defining.
- The chimney breast or alcoves. Slatting a chimney breast, or just the alcoves either side, highlights the room’s architecture without overwhelming it.
Avoid walls broken up by several doors or windows. Too many interruptions break the continuous lines that give slats their impact.
Getting the orientation, spacing and finish right
Orientation. Vertical slats draw the eye upwards, which can make a room with a low ceiling feel taller. Horizontal slats lead the eye along the wall, making a narrow room feel wider. Vertical is the more common choice for living rooms, but horizontal slats can look striking on a long media wall.
Spacing. Narrow slats set close together create a fine, subtle rhythm, while wider slats with larger gaps give a bolder, more graphic look. Wider gaps generally expose more of the acoustic backing, which can improve sound absorption.
Finish and colour. Light oak or whitewashed tones keep a small room bright and suit Scandinavian and Japandi schemes. Mid-tone walnut adds warmth and pairs well with mid-century furniture. Black or smoked finishes create drama and work especially well behind a television, where they make the screen blend in when switched off. Repeat the slat tone elsewhere in the room, such as in a coffee table or picture frames, so the feature wall feels connected to the rest of the space.
Using lighting and styling to finish the look
Lighting is what brings a slatted wall to life. A warm LED strip fitted along the top or bottom edge washes light across the slats and casts soft shadows into the gaps, which emphasises their depth. Wall lights or a floor lamp angled towards the wall create a similar effect for evenings.
Keep styling around the feature wall simple. A few well-chosen pieces, such as a slim console, a large plant or a single piece of art, let the texture of the slats stand out. Overloading the wall with shelves and ornaments works against the clean lines that make slats appealing in the first place.
Practical tips for planning and installation
A little preparation makes the difference between a feature wall that looks professional and one that looks improvised:
- Measure carefully. Record the wall’s width and height, and the position of sockets, switches and skirting. This tells you how many panels you need and where cuts or cut-outs will fall.
- Plan around electrics. Decide early whether you want cables hidden behind the panels or new sockets for a television or lighting. Any new electrical work should be carried out by a qualified electrician.
- Check for hidden pipes and cables. Use a detector before drilling, and follow the manufacturer’s fixing guidance for your wall type, whether solid masonry or plasterboard.
- Start with a level line. Walls and floors are rarely perfectly straight, so use a spirit level or laser level to set the first panel. Every panel after it follows that line.
- Consider fire performance. If the panels will sit near a fireplace or log burner, check the product’s fire rating and the stove manufacturer’s required clearances before installing.
Some products are supplied made to measure and ready to fit, which reduces on-site cutting and gives a cleaner finish. Others are cut to size during installation, which suits confident DIYers.